Part 19: Chapter 15 and The War Room Part 15 (Supports Explained)

I always think of this as the first unique chapter of Hector’s story, but of course it’s technically only the first additional chapter since Another Journey (Chapter 11) was unique to Hector’s story but replaced Chapter 11 of Eliwood’s story. It’s a chapter with a reputation as being very difficult. There’s some truth to that, though it’s not really a matter of strategic difficulty so much as just tough enemies.
Chapter Summary:
After defeating Erik and realizing Marquess Laus and the rest of his army had slipped away, Eliwood and Hector rest in castle Laus and try to find where Darin had escaped to as well as take care of business before giving chase. Suddenly they come under a coordinated attack by an elite group of mercenaries working for Darin who had already infiltrated the castle.
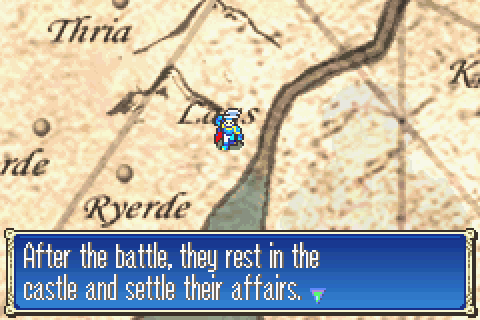
It’s not 100% clear why this chapter only occurs in Hector’s story, and I think this narration is the best explanation we get. With Hector in charge they dally a bit while he (presumably) tries to contact Ostia or give Oswin a chance to and otherwise spend more time in the castle than they would if Eliwood had his way. Probably in Eliwood’s story the mercenary group attacks the castle to find Eliwood already gone.

Are castles EVER actually used for their intended purpose in the FE series? In every chapter I can think of that involves the player on the offense against one, the enemy either ignores the fact that they have a castle and sallies forth to meet you in the field or apparently just leaves the gates open and fights you corridor by corridor on the inside. Or both in the case of Noble Lady of Caelin and then Whereabouts Unknown later in this game.
Every time the player is on the defensive, the enemy is almost always inside the walls already somehow. Or you sally forth to attack them on the field outside.
It’s like the writing staff has no idea that castles were built to keep people out without having to actually fight them fairly.
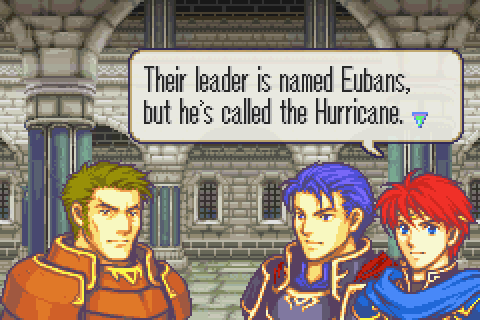
Marquess Pherae told Eliwood about this infamous mercenary group a long time ago. This also ties in this chapter to one a good deal later in the game.
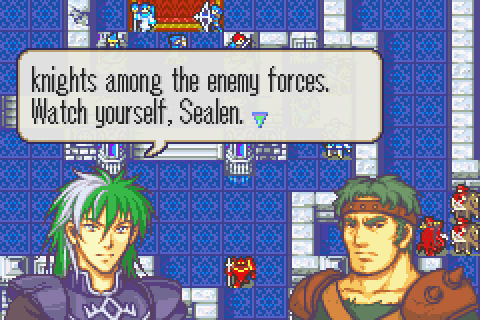
The enemy discuss their plans briefly and Heath tells Sealen to be careful and avoid getting killed after explaining he’s going to go secure the escape route in case things go wrong. Although we see a decent number of conversations among them, we don’t learn much about the structure of Eubans’s mercenaries other than that Eubans is at the top.
We do know that both Heath and Sealen have men under their command and I suppose this chapter suggests the two are rough equals in standing since none is giving orders to the other. Apparently they don’t know each other well since Sealen finds Heath’s concern for his safety to be strange coming from someone he knows so little.
Perhaps this means Eubans’s company is large enough that they’re usually divided into smaller groups doing multiple distant missions at once. This would also explain why Eubans himself doesn’t appear to be here- though on the other hand Sealen implies that he’s taking orders from an officer higher up as he relays his battle plan and it’s stressed that Eubans’s company is loyal to Marquess Laus.
If they appeared only in a single chapter (Kinship’s Bond), the company could simply be dismissed as unimportant to the story, but they make 2 appearances in HHM which piques my interest enough that I kind of wish they got a third. It seems like an interesting group and a more credible danger as an army than the Black Fang.
The War Room, Part 15
Now would be a good time to talk about Supports and their role (or lack thereof really) in max ranking HHM.
For those of you unfamiliar with the FE series, nearly every game in it includes a way to have your characters form special bonds with each other often called a Support relationship. Besides that the conversations between characters as they develop their supports are often the best way to find out more about the lives and personalities and secret backgrounds of the characters in the game and besides that developing the highest possible support level often changes what happens to those characters in the epilogue (e.g. they marry or travel together as best friends instead of going off on their own), Support relationships also have beneficial mechanical effects.
Exactly how one acquires Support relationships and what they do varies greatly game by game. In my opinion, the GBA titles have some of the best and most interesting support conversations to unlock, but perhaps the worst system for unlocking them. Here’s how it works:
Each character has a hidden (until late in the game when Nils can tell you it) and predefined list of other characters they’re capable of supporting. Many of these are exactly what you’d expect. Priscilla, for example, can support her brother Raven and her bodyguard Erik. Some are less so. Priscilla can support Guy and Heath as well as others and there’s no particular indication in advance that that would be the case.
Once you know whether your units in question are actually capable of supporting each other, the way to unlock the conversation is to have them finish their turns next to each other for many turns.
How many? That depends on each individual pairing of units. Every possible support relationship has its own base number of ‘points’ and its own growth of ‘points’ per turn. Each time the points accrued = a new multiple of 80, you can have one of the units move next to the other and click ‘support’ to have them talk to each other. Each unit may have no more than 5 total support conversations ever and no unit may have more than 3 support conversations with any given other unit. Each conversation had will increase those units’ support level from nothing to C to B to A level support, which will be noted under their inventory.
A few caveats: no pair of units may have 2 conversations with each other in the same chapter. They can continue to accrue points but will not cross the threshold to the next level. Further, no units can gain support points at all in Lyn’s story.
How do you know how many points a pair of units starts with and how many they gain per turn? Honestly, you should just consult this chart: http://serenesforest.net/blazing-sw...cters/supports/
So now you know how to unlock support conversations, but what does having a support relationship actually do? Well have you noticed how on their stats page, every character has “Affin” and then an elemental symbol of some kind? That’s the character’s Affinity type. Each Affinity has a suite of bonuses to damage, defense/resistance, hit chance, avoid chance, critical chance, and/or enemy critical chance reduction. For each level of support two units have, they each grant both themselves and their partner that set of bonuses. These bonuses apply only while the two are within 3 squares (so longbow range) of each other.
You can check the exact bonuses granted by each affinity among other things here: http://serenesforest.net/blazing-sw...ts/calculation/
So that’s how you get supports and what they do. But how does this affect HHM max ranking? Well to be honest, it really doesn’t. Don’t get me wrong, supports are fairly powerful, but you will have a very hard time acquiring any of them except a handful like Lyn/Florina and Eliwood/Hector that start out almost ready to go. Your units are all going to have different things to do at all times and your formations are going to be a matter of what’s necessary to defeat the enemy and not have anyone die. Very rarely will you have the luxury to just stand any two units you want to next to each other for more than a single turn in a row. Most supports take about 30 turns to reach the first level; it’s only a handful that can be done in 20 or less. And even 20 turns of any given 2 units standing next to each other is more than is likely to happen before the end of the game considering how often you need to scatter your troops to achieve numerous objectives or switch up which people you bring.
Furthermore, even if you do manage to unlock some conversations before the end of the game, you’re frequently going to have no choice but to send those units to opposite ends of the map or outright not bring one or both of them at all and therefore not get the bonuses you worked so hard to unlock. You are not allowed to bring many characters to most later HHM chapters and support bonuses are not worth bringing someone otherwise useless for.
Acquiring support points should probably be one of your lowest priorities, but if you do happen to see a chance to, say, stand Hector next to Eliwood with no tactical downside, then do it. If that happens a few times, you’ll be able to have them converse the next time the two are in the same place and don’t both need to spend their turn doing something else. And then they’ll each get to enjoy small but non-negligible bonuses when they’re together for the rest of the game. There’s no downside to that if it can be arranged, so go for it, but don’t sacrifice speed or XP or anything to build up supports.
Battle Preparations & the Map
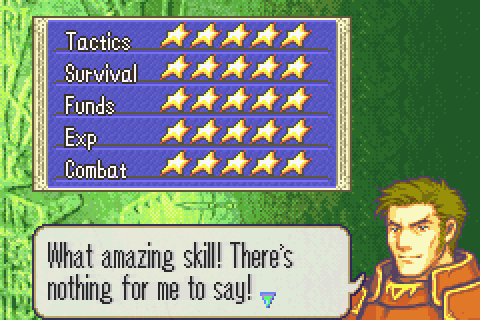
Always check your ranking. I won’t show mine from here on unless there’s something important to note, but you definitely want to check yours every chapter first thing. You really want to catch any problem as far in advance as possible so that you actually have a chance to solve it. Because this is a 0 chapter and takes 8 turns and there’s no way to build up an 8 turn surplus by now, I’ll drop to 4 tactics stars after this chapter but I’ll soon have dug myself out of that hole and begun saving for 19xx.
.png)
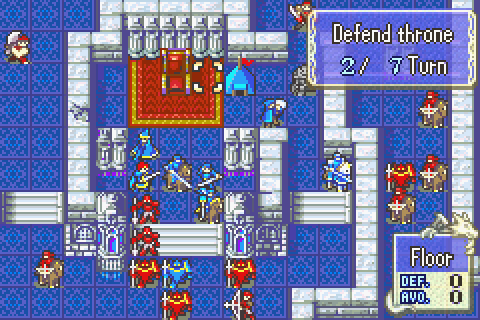
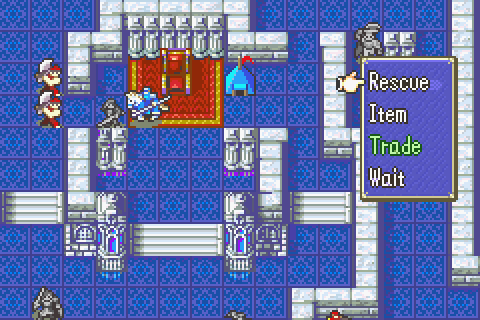
Units Allowed: 9
Objective: Protect the throne for 7 turns
Secondary Objective: Kill Sealen, the boss, to get his Dragon Shield
Secondary Objective: Get the Silver Axe from the left treasure chest
Secondary Objective: Get the Mend staff from the right treasure chest
Secondary Objective: Steal the lockpick from the enemy thief
Secondary Objective: Kill as many enemies as possible to maximize XP gain
Reinforcements: There will be a large number of enemy reinforcements but they stop if the boss is killed. I killed Sealen around turn 5 or so and didn’t count the exact number of reinforcements I fought, but it was substantial. There might be as many as 12 axe fighters and 8 cavaliers (both quite well armed with a variety of weapons) and about 6 total myrmidons and mercenaries by the end of the level if Sealen isn’t killed.
Turn Limit: 0. It’s another 0 chapter and this time there’s absolutely no way to finish faster than 8 turns (remember, the game counts an extra turn at the end of most survival chapters)
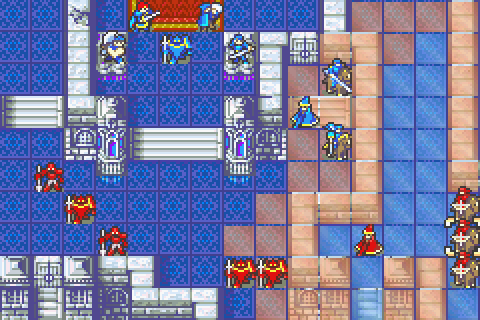
It’s a fairly small but complicated map with a lot to do and a large number of dangerous enemies- including a ferocious boss who moves. Making things more troublesome than they had to be, a locked door divides your forces and leaves 3 of them stranded perilously close to the boss and his longbow. Since no door keys have yet been available, only Matthew or the enemy thief (who will actually prioritize it) can open this door.
The top area may look safe, but don’t be fooled: not only are a large number of axe fighters about to break down the left cracked wall and charge in, but the nomads near Sealen will soon charge upwards after that mercenary opens the top door.
Meanwhile, hacking through the enemy lines to get Matthew to the treasure room – let alone stealing the enemy lockpick- takes a significant share of your 7 turns. And since the enemy thief will steal the silver axe first and then the mend staff (and both count as weapons), it’s impossible to ever acquire both if the thief is allowed to steal both.
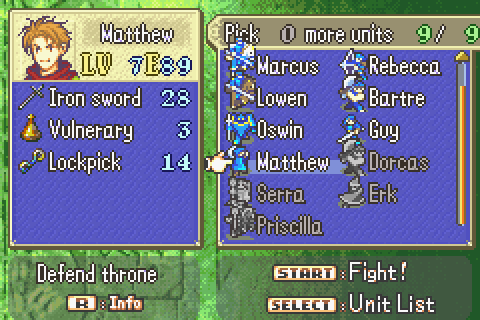
This is the first chapter since Lyn’s story on which you must choose not to bring some of your troops, and it’s absolutely essential to choose well. At long last I’ll be able to dump Rebecca and Bartre from the team!

One very important consideration is that Matthew may not be ABLE to steal from the enemy thief. In which case the enemy thief could, in fact, actually steal from Matthew and thereby screw you over completely for the rest of the story. Fortunately, because my Matthew is quite well leveled, he enjoys a decent speed advantage over the enemy thief and thus is capable of stealing his lockpick. Always check this kind of thing on HHM. On some chapters the enemy thieves are 20th level, meaning you can only steal from them if your Matthew has maximum speed already.
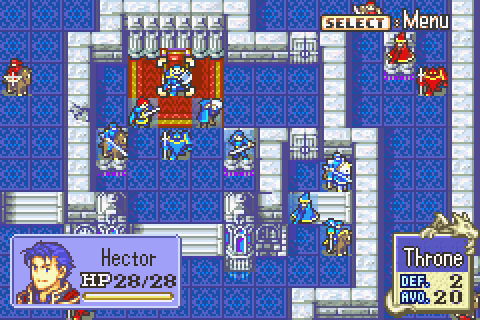
After a lot of thought (and a first attempt where I tried to not bring Marcus at all and ran into trouble as I expected), I ultimately concluded that something like this is the best starting formation. It’s best to put many of your fast units in the bottom section of your formation so that they can escape to safety from Sealen’s huge range. Alternately, you can have Matthew open the door and let them out. That exposes him to enemy fire, wastes his time, makes the enemy thief go for the treasure sooner, and can leave your bottom units wasting their turns running in a loop around to get back to the fight.
I've decided that this is actually for the best though because I need the thief to go for the treasure faster, rather than slower, in order to efficiently steal his lockpick and kill him and then claim it all. Further, Marcus and Hector can get Matthew back out of range and then begin shredding the nearby units while aggroing Sealen to kill later. My initial strategy of planning on Hector alone slaying all the top units and then making a run at Healen simply would not work because Hector is too bad at quickly killing the mercenary while not getting torn up by the mage.
Oswin and Lowen are my best tanks vs lance users at this point since Marcus and Hector are occupied, so the two of them start close to the front. Eliwood, Guy, Erk, and Matthew are my other solid combat units and will need to be in the fray one the initial tanking is done. Their specific positions don’t really matter much at the start since they want to stay back behind Oswin and Lowen on turn 1. As the guy with the best ability to double-attack and the best defenses, I decide on Guy to hold the line against the axe fighters when they appear. Meanwhile, Priscilla (helped by Eliwood probably) will cart Erk to safety.
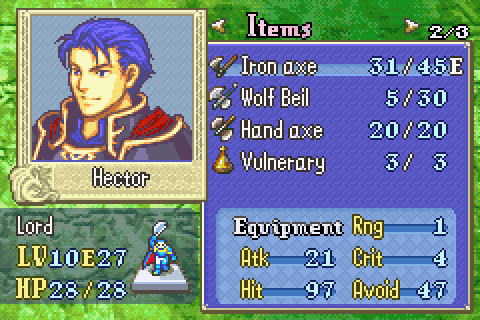
This is one of the biggest problems I’m facing. Due to some bad luck with my other units that I mentioned last time, as well as this one turn on 13x, I had to use about 6 more Wolf Beil charges than I want to have by now. I can only use 4 more forever and I’m going to want to use it on Bauker, Bernard, Uhai, and Darin. So I’m in trouble any way I slice it on one of those chapters. Probably I can find a way to not use it vs Bernard by having Sain do the heavy lifting and maybe vs Uhai by having someone slam him with the Horseslayer instead.
Other than that, gearing up is pretty simple. Priscilla gets a heal staff, some handaxes are taken from people who aren’t in the chapter and put in storage, but most people really have what they need already. Just in case I get a chance to lure Sealen down south instead of north, I give Oswin the horseslayer, but my first try of this chapter told me that that probably isn’t a good idea because none of my units are good enough at killing the mercenaries and myrmidons who will block by path to him.
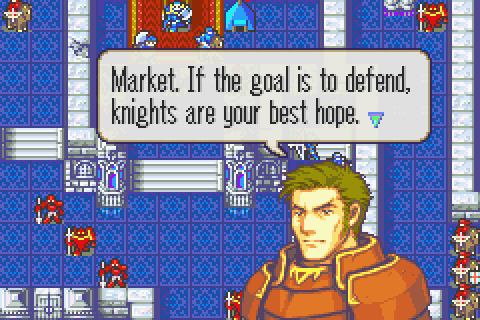
And as the map begins, Oswin gives some correct advice. However, my goal isn’t to defend, my goal is to slaughter everyone wearing red and steal everything that isn’t nailed down. In this game, sometimes the best offense is a good defense though so Oswin will see fairly heavy use.
The Characters

“We’ll attack from the front and send another unit behind. We want to drive the enemy into a state of chaos. The ambush units are concealed as ordered. When the enemy splits its forces, we strike. That’s all. Go.” –Sealen, Chapter 15
What a piece of work is Sealen! How noble in damage, how infinite in movement! In speed and defenses how express and admirable! In accuracy how like an angel! In valuable drops, how like a treasure chest!
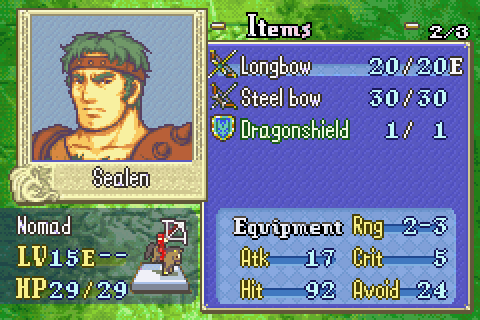
Sealen is a lot like Puzon in that he’s a totally optional boss who’s a lot more dangerous than most of the people you’ve fought so far, because of both solid stats and good weaponry. But unlike Puzon, this map is designed to favor him. He’s able to control a huge area with his giant movement and the unmatched 2-3 range of his longbow. And unlike Puzon, he drops an item so valuable that there’s really no choice but to fight him. Only Hector and Oswin and (to a much lesser extent) Marcus can stand up to his attacks with that steel bow. No one can retaliate while he uses the longbow. And he plays pretty smart and doesn’t make it easy to trap him (I tried that on the first run and it just wasn’t feasible given everything else going on and the mercenaries and myrmidons and cavaliers running to his aid).
Like most Sacaens, he’s fairly taciturn. He gives short, staccato orders to his men and has little else to say about anything. We know that he doesn’t expect his fellow mercenaries to care if he lives or dies- and thinks to himself that Heath is not cut out to be a mercenary given that Heath does care- and that he’s at least capable of ordering the execution of a rather complex and sophisticated plan. He might or might not have been the one who concocted it too. Evidently, Eubans trusted him with a fairly large and important command so he must be well-reputed in the group. Other than that, we don’t get a chance to learn much about him because he has so little to say.
Have I mentioned his darned range? Not only is the whole bottom starting area covered, but any attempt to fight the southern reinforcements is going to be severely hampered by having to stay out of that or get shot dead unless your name is Oswin.
Playing Through:

Mostly because I need to make the enemy thief move toward the treasure room sooner, I decided that the first thing I have to do is open this door myself.

But that would make the mage go for Matthew rather than someone with a handaxe, so Hector runs to his position near the door and rescues Matthew and then Marcus takes and drops him before returning to the spot he’ll be luring Sealen to. Remember, cavalry can move, take someone rescued, drop them, and then keep moving.
On the left front I just put Oswin on point and had Priscilla and Lowen get Erk to safety. Now comes the trickiest turn of the chapter. As you can see, I have a huge number of troops bearing down on me from the south as well as Sealen and a ton of men moving north for Hector. I need to thin the herd and establish a defensive line. If I can do that, the enemy to the south will crumple up like aluminum foil. That will let me spare Guy- and maybe someone else- to stop the soon to be rapid flood of axe users.

You may have noticed that Matthew was the rear unit of my southern contingent and now I’m having him attack first. That’s generally a good tactic. If you have the rear units move up and attack first, you’ll typically be able to attack with everyone. On the other hand, if your front soldiers move up to the enemy and attack them first, you might end up in a situation where your back soldiers can’t reach the remaining enemy so their turns are wasted. Avoid that situation.
Oh, and it’s a bad level.

Although Fire is more cost-effective, I let Erk keep both it and his Thunder tome because sometimes- especially at the low levels- just a little bit more damage can help a lot and be worth a fair amount of money. Here it weakens this knight enough that even Matthew could probably kill it now and nets Erk a solid level up.

A great level for Lowen. He’s been pretty meh so far, but this really isn’t bad for a level 5 cavalier.

By the end of the turn, you can see I wiped out most of the enemy and established some good defenses. Marcus ran south to weaken one enemy, but his huge moment will let him get back up to Hector in short order.
Really, this is a straightforward map tactically. Just attack the enemy as efficiently as you can and hope your troops are good enough to handle them.

Since Hector has a lot of fighting to do, I have him use a vulnerary and keep his handaxe at the ready.

Marcus takes the opportunity to hit Sealen for just under half his health. This will make it much easier for him or Hector to finish Sealen in a turn or two.

And hey, Marcus gets an excellent level for Marcus out of it. Of course, I’d rather he’d gained less XP but I couldn't really prevent enemies from suiciding to him instead of my weaker units on the chapters where I needed to get him to a village fast.

Perhaps I’m forgetting, but I don’t think my Guy has gained a good level up yet. Or even a decent one. Yeah, I just compared him to his HHM starting stats and he’s gained 3 HP, 2 skill, 2 speed, 2 luck, and nothing else in 3 levels. That’s barely even average for those stats. Oh well, I never intended to use him much longer anyway.
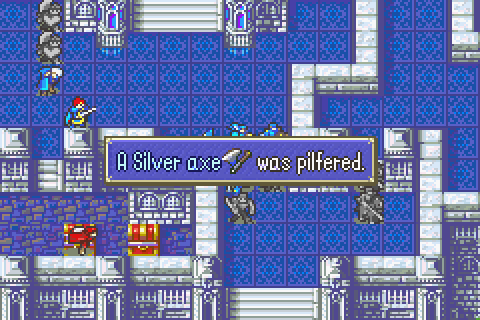
So the southern units have swept their way through most of the enemy and Guy (with a little help from Matthew and Eliwood) is tearing through the fighters at a decent rate. The enemy thief is injured already so next turn Matthew and Eliwood can take his lockpick and kill him. Having the enemy thief do some of the work opening the door and the first chest saved 2 turns on Matthew for fighting- more than making up for the 1 turn I spent opening the other door so the enemy thief would go this way.

Next turn, Matthew takes the lockpick.

Eliwood finishes the thief for a great level

So I score a silver axe

Erk gets another great level. He’s slow at the moment, but that will surely change in the near future.

Well not great, but all in all he gained pretty much every stat in 2 levels this chapter so that’s nice across the board.

With a bit more help from Marcus first, Hector finally takes Sealen down with his handaxe and gets yet another bad level. My early great luck with him has basically been eroded down to average overall by the recent string of terribleness. He’s still slightly faster than expected, but he’s really lagging in defense and resistance among other issues.
I’m running out of turns and want to make sure every single enemy dies before the end. If both of these fighters decide to go for Guy, I won’t be able to kill them both in time without Marcus’s help up here. The bottom front has enough firepower to definitely kill everyone next turn.

Yes indeed, just after killing the last enemies down there, Matthew gets the last treasure.

And Eliwood takes down the last enemy. Unlike the Wolf Beil, his rapier is still in decent condition even though I’ve been using it willy-nilly.

That’s that! I’m not really sure what enemy units he’s talking about. Maybe he’s hallucinating from losing so much blood tanking for everyone.

And Hector is ready to get back to the plot next chapter.
Total Restarts: 7. My initial strategy to have Hector kill the top units and then fight Sealen alone was just not workable because he took too long to kill the mercenary. My backup plan also failed because even though Oswin could lure Sealen to attack him, it was impossible to surround and kill him since no one could take out the mercenaries and myrmidons tanking for him. That kind of thing is impossible to know without playing the map and finding out since you can’t view the reinforcements’ stats while planning. So I had to restart that time and use this strategy instead.
Turn Surplus: -6 (Back in debt again because this chapter will always cost you 8 no matter what). Fortunately I now have 6 chapters to undo this setback and start building up a surplus in preparation for 19xx.
Things I Regret Missing: The lockpick on chapter 11, that darned archer on chapter 11, this one brigand who attacked Marcus on chapter 12, 2 more brigands who ignored everyone else to attack Marcus on chapter 13x, and 2 archers who ignored Hector and Dorcas (DORCAS!) to attack Marcus on chapter 14. Nothing was really missed on this chapter. Even if I had allowed more reinforcements to spawn, there would have been no way to take any more out on that last turn really.